

(continued from Part One)
When we last saw our hero: me, he had just nailed down the concept for his new game, What Linus Bruckman Sees When His Eyes Are Closed. Okay, so maybe I’m not “our” hero… definitely “my” hero. Anyways, it was time to take this game out of the shower.
First of all, I had to nail down the stories and puzzles. So I broke out a pen and paper and started the detailed plan. The main puzzle is quite complicated, so I whipped up a flash prototype to try it out and tweak it until I was happy with it. It’s a bit rough, but you can see the prototype here:
Or click here to try it out in full size.
I had an idea of the kind of coding that it would take to implement the two simultaneous game-worlds in the AGS engine. But before I could start implementing anything, I needed to have something to implement. On to my least favorite part of game development: Art.
I am not an artist, and beyond elementary school I've never taken an art class. I've taught myself a number of programs, but tools do not an artist make. So, I have to substitute style for skill, and I needed two distinct styles for the two distinct stories.
To help with the creation of two distinct styles, I would use two different art programs. The dark sepia-toned "Kami" would be created using Photoshop while the Saturday morning cartoon style of DocMcVonSpaceburger Jr. would be created in Flash.
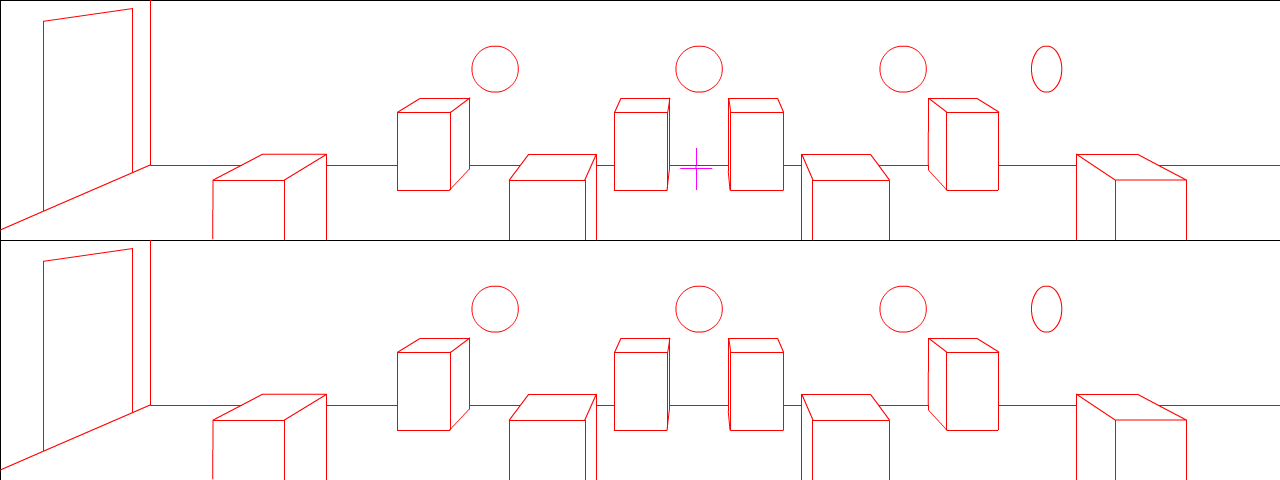
First off, however, I needed a wireframe to act as a guideline for the two rooms. Every element of the rooms, the podiums, buttons, and doors, needed to line up perfectly to support the simultaneous double-cursor interface.
The first art that I created for the game is one of the last images that you see upon completing the game. I knew that I wanted a layer underneath the background for "Kami", barely visible for most of the game, but hinting at the ending. Furthermore, I wanted this hidden layer to be mostly black and white, but with splashes of color for emphasis. I created this by making various Google image searches and then manipulating the images into place on the wireframe background. This should probably be considered a spoiler and should not be clicked on unless you've finished the game:

Next, I took a single rock texture that I found, again, via a Google image search, and began layering it on top of this background, heavily utilizing the stretch, skew, and perspective tools, and blended it all together. Finally, I added some layers of hand-painted shading and did some toying with the contrast, brightness, and saturation settings to come up with the final background (note that you can still see the layer from the previous image showing through in some points):

After finishing the background for the top half of the game, I set to work designing the bottom half. As I've mentioned before, I wanted a "Saturday morning cartoon" look for this part.
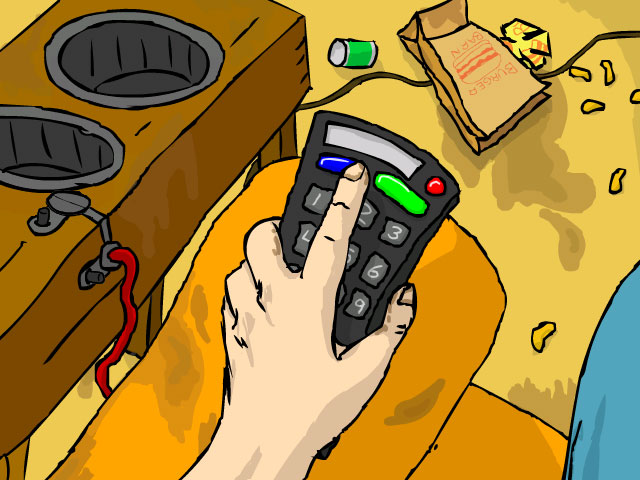
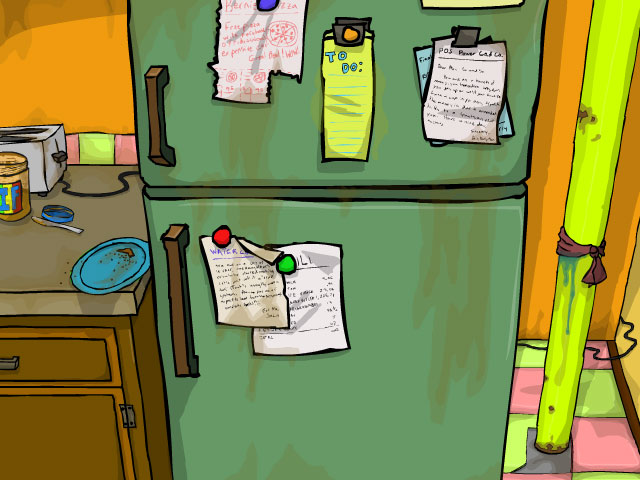
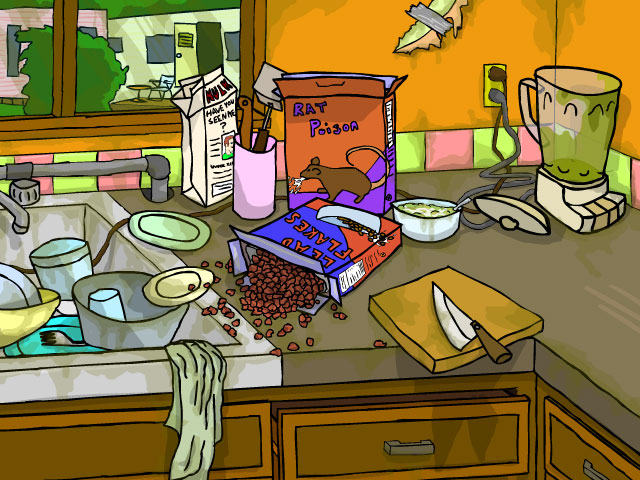
When I first started working with AGS, I set out to make a small first-person comedic game called Domestic Conspiracy about a married couple who were trying to kill each other via overly complex and completely ridiculous plans. I know. Hilarious.
I never finished this game for two reasons. First of all, while making the game, I was learning how to use AGS and the it became full of horribly messy and difficult to debug code. Secondly, while making the game I was learning how to create cartoony art in Flash and the first backgrounds that I produced looked so crap compared to my later attempts that I realized I was going to have to redo a lot if I wanted it to look consistent.
So, the game was a learning experience for me and had I finished it, I would have likely been wholly unsatisfied with the results. But it was good practice and I was going to put the techniques I had learned to good use.
If you look at the Domestic Conspiracy images above and compare them to the final DocMcVonSpaceburger background below, you'll see that I used pretty much the exact same style that I had established back then.

 Next, I needed some characters to populate my two worlds. Now again, I am not an artist, I just play one on youTube. When I try drawing a character by hand, the results are not pretty. So again, I'm substituting style (and shortcuts) for technique. Here's where that whole restricted development came in handy: I knew that I couldn't draw a walkcycle for a character that I would be satisfied with, but I needed a character that would walk around the screen. So, designing within my restrictions, I shaped the story to fit my skills.
The character would be a ghost. Floating would be a lot easier to draw than walking (and in fact it was mostly done in the game's code, not in an art program). So, I simply needed to create a character that looked in four different directions. I created our unnamed heroine in Photoshop using techniques similar to the ones I used creating the background. I found pictures of a few different sets of samurai armor and combined them, shaping them into a more feminine figure. I think the legs and arms came off a picture of a model walking the runway and the face came from a mask I found on Google. Pretty simple, really.
As you can see (click the image for full size), the result was a lot higher resolution than was necessary. I didn't bother cleaning up some of the rough spots because I knew that I would be shrinking her down to a much smaller size for the actual game (though I couldn't help including a few closeups in the game, because it looked so cool).
For DocMcVonSpaceburger Junior, I needed to use completely different techniques. I wanted to stick to the vector art that had been used to create the background, but again, I am incapable of drawing a walkcycle. So, I decided to go 3d.
I had played around with Maya and 3DStudioMax in college, and I knew that it would take me a really long time to learn enough about these complex programs to make a fully rigged character from scratch. So, I decided to go simpler. Swift3D is a fairly low-tech (when compared to the other programs I mentioned) 3D application that is specifically made to allow the easy creation of 3D assets for use in Flash. It was also a program that I had been meaning to learn. So, I looked at this as an opportunity to kill two birds with one stone.
 The first thing I did was mess around with some tutorials on the Swift3D site. One of them in particular, the Advanced Head Modeling Tutorial looked extremely helpful. In fact, it's pretty much exactly what I used for Junior's head. If you look at the end of the tutorial's step 3 (before he adds the nose and mouth), you'll see a shape that pretty closely resembles Junior.
So, big thanks to Jim Foley for that tutorial!
The rest of the body and the walking animation was all me, though. It was fun, but a little frustrating. Swift3D seems to have a few bugs that make body parts go flying every now and then. Here are a couple early animation prototypes:


I have no idea what made me give him a pink speedo.
Swift3D exports animations straight into Flash, so it was easy to quickly set it in the background and make sure that it blended well with the style that I had already established.
So, after all of that work, I had the major art assets available for implementation into the game's engine. I was finally ready to open up AGS... next time on WLBSWHEAC Post-Mortem! Same bat time, same bat channel. (Presumably, channel xii.)

Brilliant post… which also managed to kill some of the questions I had prepared… Nice… Anyway… You got my mail address right?
December 21st, 2006 at 23:18Err… no. Have you sent the questions yet? I haven’t recieved anything. I’ll presumably have your email address after I’ve gotten them. If you have sent it, could you resend it? vincexii@yahoo.com
December 22nd, 2006 at 8:40Oh..thought you’d be able to get my mail since it’s constantly being submitted everytime I post a comment… Still… now I got yours… I’ll send them as soon as they are ready and hopefully before you go and answer them in an other post of yours….
Take care and enjoy your holidays… Cheers!
December 25th, 2006 at 1:47Wow, so you are like a young student who just got this idea about making a game – cool. The puzzle is really well done. I can see after completing the game that the it wouldn’t have been very hard to make but seriously hard to do i right…
April 21st, 2007 at 0:32It’s also good to see what your ideas behind the different things were. Love the speedo and I’m waiting for the next article :)
Thanks, Mr. Andersen, and congrats on joining the Hall of Completion!
Luckily, you don’t have to wait for the next article! It’s already been posted!
April 22nd, 2007 at 18:40Thank You
April 23rd, 2007 at 5:07Nice!
September 1st, 2007 at 5:51